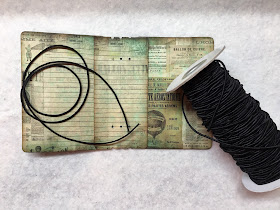
So, here's my simple tutorial for threading the elastic cording.
But first, you'll need some 2mm elastic cording. This cording comes in a wide range of colors, but I typically use either black, white, or beige -- depending on the colors in the journal cover.

You can easily find the cording on Amazon. Click HERE.
If you are new to the Eileen Hull Passport Die, you can find it HERE.
NOTE: As an Amazon Associate, I earn from qualifying purchase.
Tutorial:
To fit the signatures into the journal, your goal is to have inside lengths of elastic cording that will fit the height of the pages. However, I wanted to show the least amount of cording on the outside of the spine -- at just the top and bottom of the spine where it wraps around.You can see the three lengths of cording giving you the full length of the spine for inserting the signatures. The parts of the cording that stretch across the holes in the spine and are tied together will be covered up after you insert the signatures.
On the outside of the spine, all you see of the cording is where it wraps over the edges.
Step 1:
Cut the 2mm elastic to about 25 inches in length, which is five times the height of the journal. This gives you plenty of elastic to make it easy to tie the ends together when done.Step 2:
Start with the center top hole. Thread the elastic from inside and leave a 2- to 3-inch tail on the inside.Step 3:
Wrap the long piece of the cording over the top edge (in the spine's top groove) and back to the inside. Carry it all the way down to the bottom edge. (This will be for the center insert.)Wrap it around the bottom edge of the spine and thread through the center bottom hole from the outside to the inside.
Step 4:
Carry the cording across the the left bottom hole and thread from the inside to the outside as shown above. Wrap the cording around the bottom of the spine, carry the thread to the top of the spine, around the top, and into the top hole.NOTE: As you are working, try to keep the elastic cording taught so that there isn't too much slack. This will ensure that your signatures are nice and tight in the journal.


Thank you so much for this tutorial. I have always loved the way your binding system looked. Great instructions.
ReplyDeleteThank you for taking the time to make a tutorial! Your book looks beautiful!
ReplyDeleteThis is super! Now I have bookmarked the post, I love the look of this from the outside and it works great for full height signatures. Thanks!
ReplyDeleteGreat tutorial and beautiful journal covers! This tutorial will be really helpful for people. =)
ReplyDeleteFabulous tutorial Linda! Thanks for being so great about sharing with us newbies!
ReplyDeletethanks again Nancy ..very sharing and caring of you to help us out x x x Liz
ReplyDeleteThanks again for this great tutorial; I've had hits-and-misses with my Passport Die (not the die, the putting it together part). I've used Fabri-Tac and other glues, and sometimes they stick, sometimes they haven't, so frustrating! But I'm going to try all the products you recommend (Scor tape, Adhesive Sheets, etc.), and I will be using your links to buy them from Amazon so that I can at least thank you in that way for this wonderful, detailed, step by step method.
ReplyDeleteHI, Thanks for your tutorial. It is very helpful. I was wondering how you tie the elastic journal closure? I don't see it on the inside of your samples above. I worry that the knot would get in way of the signatures. Is there a way you could possible show a picture of what it looks like? Thanks ever so much.
ReplyDeleteCate: I just tie with a square knot and trim the ends to about .5 inch. My signatures are thick enough that once they are inserted, they cover up the knot and it doesn't get in the way.
ReplyDeleteI hope this helps (and that you see this response since there was no email address associated with your comment.
Nancy