Welcome blog hoppers!
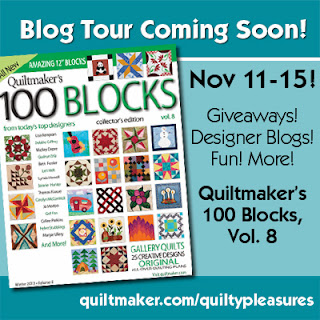
I'm so happy it's finally my day on the Quiltmaker's 100 Blocks Volume 8 blog hop! And even more excited to share my block with you. And to give you the opportunity to win a copy of Volume 8 from Quiltmaker Magazine! And guess what? I'm also giving away two additional copies myself!
Edited to add: I randomly picked the three winners -- Jacklyn Grimm of WI, Sherry Book of IA, and Donna Cutting of Saskatchewan, Canada. Congratulations! And thanks to all for stopping by and commenting!
Ta da! Here it is -- my beehive block named Deseret (which means honeybee). The instructions in Quiltmaker give you details for traditionally piecing the block with "sew and flip" corners. Easy peasy!
The beehive is the state symbol here in Utah and I have always been fascinated with its shape and significance. When Brigham Young and the pioneers first arrived in the SLC valley in 1847, they chose the beehive as their symbol because they would have to be industrious and busy bees in order to make the desert "blossom as a rose".
I began collecting beehive memorabilia back in the 80s -- such as ceramic honey pots, folk art with beehives, you name it! Back then it was hard to find beehive tchotchkes, but soon you could find beehive stuff everywhere. (Did I start a trend? Probably not.) It wasn't long until I was receiving beehive-themed birthday and Christmas gifts. So now I have quite the collection. I even spotted a cloissoné beehive ornament while visiting Beijing, China a couple years ago. Yep, I bought it.
Well, back to quilting. Wanna see how I set this block into a quilt? Here's the first quilt I made featuring this block -- totally from scraps and stash. It finishes 48-1/2 inches square. This one was quilted by Catherine Timmons (Cat's Attic Quilting in Bountiful, UT) with a simple overall stipple.
I knew that not everyone gravitates toward dark and medium traditional fabrics like I do, so I also made the quilt using fabrics from a couple collections by Fig Tree. It's a bit less scrappy and I planned the placement of the fabrics in the setting blocks a little more precisely. I love how it turned out, even if beehives aren't supposed to be light green! This version was quilted by Sue Baddley using a digital design.
One thing you need to know about the beehive blocks in the quilts above. Unlike the instructions in the magazine, I didn't add a background strip along the bottom of the block. Instead I doubled the size of the background strip at the top of the block. I felt like it "floated" within the chain blocks more evenly
Here's one last variation -- but I increased the beehive block from 12 inches to 30 inches and created a medallion quilt -- complete with honeycomb hexagons and embroidered honeybees. This quilt finishes 68.5 inches square.
I think that the gold/tan and black jewel box blocks in the pieced border look like a bit like the iconic honeybee.This quilt was custom machine quilted by Jen Alexander. Here's a close-up of the quilting and the honeybee embroidery.
Be sure to follow the 100 Blocks Blog Tour through Nov. 15 at The Quiltmaker Blog Quilty Pleasures for inspiration, ideas, and giveaways galore! (I'm giving away a copy of my book Triple-Play Scrap Quilting, along with a color-themed 10-inch square pack of fabrics as part of Quiltmaker's prizes.)
TO WIN ONE OF THREE COPIES OF QUILTMAKER'S 100 BLOCKS VOLUME 8 (one from Quiltmaker or one of two I'm giving away): Simply leave a comment below! Deadline for entries is Nov. 16th at midnight. I'll do the random drawing on Nov. 17th and will notify the winner by e-mail. If you're the lucky winner I'll be asking for your mailing address so Quiltmaker can send you your copy of the special issue.
I invite you to become a follower on my Bountiful Heirlooms Facebook page so you are notified when a new blog post goes live.
Good luck everyone -- and thanks for visiting.
Thursday, November 14, 2013
Friday, November 1, 2013
Quiltmaker's 100 Blocks Volume 8 is coming soon! And along with the eighth volume of this popular special issue is the equally popular blog tour.
And guess what? I have a block in Volume 8 and will be part of the blog tour fun! My day is Thursday, November 14. I can't wait to share with you my block, as well as example of how it works in a few different quilts.
I will be able to give away a copy of Quiltmaker's 100 Blocks Volume 8 to someone who comments on my blog post that day. Of course, it will be a random drawing.
I have also donated a signed copy of my book and a color-themed set of 10-inch squares that could be used for one of several quilts in my book.
Be sure to visit the many quilters and sponsors who will be part of the blog tour that starts Nov. 11 and continues through Nov. 15.
Friday, October 4, 2013
Spotted on a Martingale Video
A week or so ago I watched a great video on the Martingale website about how to attach a temporary hanging sleeve to a quilt. It was presented by marketing coordinator, Mary Burns.
Here's the video:
Imagine my surprise when I spotted this at the end of the video:
Yep, that's the coordinated version of my Days of '47 quilt on the wall behind Mary.
So my quilt got its 15 minutes of fame.
Have a scrappy day!
Here's the video:
Imagine my surprise when I spotted this at the end of the video:
Yep, that's the coordinated version of my Days of '47 quilt on the wall behind Mary.
So my quilt got its 15 minutes of fame.
Have a scrappy day!
Friday, September 6, 2013
Cherish is the Word
American Patchwork and Quilting recently sponsored a Pinterest contest featuring their 20 favorite pillowcase patterns from the One Million Pillowcase Challenge. This pillowcase with a train appliqué received the most pins — and was the winner of the contest. Here’s a link to the pattern if you want to make your own version.
As one of the sponsors of the one million pillowcase challenge, Handi Quilter (where I work) was challenged to make our own version of the winning pillowcase. My main contribution was the polka dot fabric and cutting the appliqué pieces with the Accuquilt Go! fabric cutter.
Here's the Handi Quilter version of the pillowcase (which we quilted, of course).
That got me thinking about the quilt I made using that polka dot fabric. It's called Cherish is the Word and, like the other quilts in my book, there are three variations for the quilt. The polka dot version is the simplest of the three to make. I appliquéd each quadrant of the block onto a background square and then stitched them together like a four-patch.
The next version of Cherish had a couple changes. Besides the scalloped border, the appliqué piece in each quadrant of the block is appliquéd to a half-square triangle (giving the background of the block a little more interest). (I think this is my favorite variation of this quilt.)
But this quilt design started with the most complex version (which was much more involved). Hence the simpler versions above. This one used Amy Butler fabrics and has a more blended look -- which was my intent, but the extra detail kind of got lost because of the blended fabric choices.
I will
probably make this version of the quilt again some day, but will use
fabrics that better show off the details of the design. After all, if
I'm going to go to all of that extra work, it better show up! Actually,
looking at the block scaled larger like the quilt photos, it would be an
interesting "big block" quilt featurong some large-print fabric. What d'ya think?
As one of the sponsors of the one million pillowcase challenge, Handi Quilter (where I work) was challenged to make our own version of the winning pillowcase. My main contribution was the polka dot fabric and cutting the appliqué pieces with the Accuquilt Go! fabric cutter.
Here's the Handi Quilter version of the pillowcase (which we quilted, of course).
That got me thinking about the quilt I made using that polka dot fabric. It's called Cherish is the Word and, like the other quilts in my book, there are three variations for the quilt. The polka dot version is the simplest of the three to make. I appliquéd each quadrant of the block onto a background square and then stitched them together like a four-patch.
The next version of Cherish had a couple changes. Besides the scalloped border, the appliqué piece in each quadrant of the block is appliquéd to a half-square triangle (giving the background of the block a little more interest). (I think this is my favorite variation of this quilt.)
But this quilt design started with the most complex version (which was much more involved). Hence the simpler versions above. This one used Amy Butler fabrics and has a more blended look -- which was my intent, but the extra detail kind of got lost because of the blended fabric choices.
Here's a close-up of one of the blocks (out of EQ7). As you can see below, there are small arc pieces on the two outside edges of the hourglass blocks.
Have a great day -- and don't worry, be scrappy.
Thursday, September 5, 2013
Latest Project
I was happy to be able to do some serious sewing on Labor Day. It had been ages since I'd spent more than an hour at a time in my studio.
So on Monday I was able to get about two thirds of the blocks done for a scrappy Ohio Star quilt, set with some alternate blocks in a unique setting. Then yesterday evening I was able to finish the rest of the blocks.
Here are the blocks laid out on my "design floor".
It always amazes me how looking at a photo always highlights where I need to make some changes. For example, the Ohio Star block at the far right of the 4th row needs a different center square that isn't so light in value. And the bottom-right star needs a center square with more contrast. But those will be easy fixes.
Next step is obviously sewing the blocks together to finish the quilt center, then gotta figure out what I'll do for the borders. I'm toying with a narrow red border (matching the 4-patches in the big "x") and then doing a pieced border that echoes the "x" as well. I just need to make sure I have enough of the red and brown fabrics.
Have a great day!
So on Monday I was able to get about two thirds of the blocks done for a scrappy Ohio Star quilt, set with some alternate blocks in a unique setting. Then yesterday evening I was able to finish the rest of the blocks.
Here are the blocks laid out on my "design floor".
It always amazes me how looking at a photo always highlights where I need to make some changes. For example, the Ohio Star block at the far right of the 4th row needs a different center square that isn't so light in value. And the bottom-right star needs a center square with more contrast. But those will be easy fixes.
Next step is obviously sewing the blocks together to finish the quilt center, then gotta figure out what I'll do for the borders. I'm toying with a narrow red border (matching the 4-patches in the big "x") and then doing a pieced border that echoes the "x" as well. I just need to make sure I have enough of the red and brown fabrics.
Have a great day!
Saturday, August 31, 2013
My two latest "addictions"
The first is zuppa toscana. Yes, the soup at Olive Garden. Having lived near so many great Italian restaurants while I lived in the Philadelphia suburbs, Olive Garden just never did it for me. But a couple weeks ago while at BYU education week, a friend and I had a quick dinner at the local Olive Garden. Since it was pretty late, I didn't want pasta and so opted for soup. I've had their minestrone but decided to try the zuppa toscana. Wow! It was so good. I knew I had to find a copycat recipe and make it myself.
I had everything I needed to make the soup except the cream and kale. So that weekend after a quick trip to the grocery store, I made the soup. This is the recipe I used. I can't take credit for the photo below, but mine looked just like it:
It is surprisingly similar to a Hungarian cabbage and sausage soup I've been making for nearly 20 years. They both have spicy sausage, potatoes, onions, and chicken broth. The Hungarian version uses cabbage (not Kale), sour cream (not heavy cream), and also has paprika and marjoram. The zuppa toscana also has bacon (gives it a smokey flavor -- which to me means it isn't very Italian, because Italian bacon isn't smoked). But the bacon does give the soup a good flavor. With fall weather coming soon (hopefully!) this will become a regular part of my soup repertoire.
OK, my other new addiction is Kaffe Fassett fabric.
Now I naturally gravitate toward traditional muted prints, such as Civil War prints or Kim Diehl fabrics for Henry Glass. I was starting a new quilt incorporating a traditional crossed laurels block. I made my first version of the block with scraps typical of my stash. Yep, a pretty ordinary crossed laurels block.
I also knew that I wanted an easy way to do the appliqué. I wasn't up to needle turn (after all, I'll eventually make about 16 blocks). And even though I like Kim Diehl's freezer paper method combined with machine appliqué, I turned to fusible web. But have you noticed, it's virtually impossible to find Steam-a-seam right now? It's out of stock everywhere. Now what was I going to do?
I also wanted to use my Go! Baby by Accuquilt to cut the pieces. Faster AND more precise than scissors. I found the perfect dye from Accuquilt.
But that definitely meant I needed some sort of fusible web material. I had heard about Misty Fuse and decided to try it out. I quite like it (it's thinner than Steam-a-seam and doesn't have a paper backing). I'll post about my experience using it soon.
Now I've got to buckle down and get those blocks done! I have no excuse. I've got the perfect fabric. I've got the Accuquilt die and cutter. And I've got several yards of Misty Fuse. Time to get busy! But first, I think I'll warm up some zuppa toscana for my dinner.
I had everything I needed to make the soup except the cream and kale. So that weekend after a quick trip to the grocery store, I made the soup. This is the recipe I used. I can't take credit for the photo below, but mine looked just like it:
It is surprisingly similar to a Hungarian cabbage and sausage soup I've been making for nearly 20 years. They both have spicy sausage, potatoes, onions, and chicken broth. The Hungarian version uses cabbage (not Kale), sour cream (not heavy cream), and also has paprika and marjoram. The zuppa toscana also has bacon (gives it a smokey flavor -- which to me means it isn't very Italian, because Italian bacon isn't smoked). But the bacon does give the soup a good flavor. With fall weather coming soon (hopefully!) this will become a regular part of my soup repertoire.
OK, my other new addiction is Kaffe Fassett fabric.
Now I naturally gravitate toward traditional muted prints, such as Civil War prints or Kim Diehl fabrics for Henry Glass. I was starting a new quilt incorporating a traditional crossed laurels block. I made my first version of the block with scraps typical of my stash. Yep, a pretty ordinary crossed laurels block.
I started thinking about how I could make the block more exciting and knew that I had to pick more exciting fabrics. So I bought a lot of Kaffe Fassett fabrics -- mostly charm squares since the pieces in the quilt are so small.
Here's my first version of the block using Kaffe fabrics on a white background. Definitely an improvement. But I didn't think I was quite there yet.
I wanted even more punch decided to make the block with a solid black background.
I also knew that I wanted an easy way to do the appliqué. I wasn't up to needle turn (after all, I'll eventually make about 16 blocks). And even though I like Kim Diehl's freezer paper method combined with machine appliqué, I turned to fusible web. But have you noticed, it's virtually impossible to find Steam-a-seam right now? It's out of stock everywhere. Now what was I going to do?
I also wanted to use my Go! Baby by Accuquilt to cut the pieces. Faster AND more precise than scissors. I found the perfect dye from Accuquilt.
But that definitely meant I needed some sort of fusible web material. I had heard about Misty Fuse and decided to try it out. I quite like it (it's thinner than Steam-a-seam and doesn't have a paper backing). I'll post about my experience using it soon.
Now I've got to buckle down and get those blocks done! I have no excuse. I've got the perfect fabric. I've got the Accuquilt die and cutter. And I've got several yards of Misty Fuse. Time to get busy! But first, I think I'll warm up some zuppa toscana for my dinner.
Monday, August 5, 2013
Quilts to honor Pioneer Day
A couple weeks ago
on July 24 the state of Utah celebrated Pioneer Day in commemoration of the
day in 1847 when Brigham Young and his
pioneer company first came into the Salt Lake valley.
The "Days of
'47" are celebrated with a big parade in SLC and smaller parades all over
the state, as well as fireworks, and performances by the Mormon Tabernacle Choir.
It is also a state holiday, although unless
you work for the state of Utah or the LDS Church, chances are good that it
isn't a holiday for you.
Since my birthday
happens to fall on Pioneer Day and one of my great-great grandfathers (and wife
and family) entered the SLC valley as pioneers only two months after Brigham
Young, I've always been enamored by Pioneer Day. So when I discovered there was a Salt Lake
City quilt block, I knew I had to make a quilt (or two or three) using that
block to honor Pioneer Day. Here are the three Days of '47 quilts, which are in
Triple-Play Scrap Quilting.
The first version I
made used Cosmo Cricket fabric called Circa 1934. I chose a dark background for
the blocks to show off the unique piecing, as well as complement the graphic
nature of the prints. By using the same black cornerstone with cream sashing strips,
a secondary shoo-fly design was created where the blocks come together. The
pieced border also uses a triangular element from the block which helps to
unite the quilt. This coordinated version of the quilt finishes 61.5 x 61.5
inches.
The planned color
scheme version of Days of '47 features red, aqua, pink and white fabrics which
have been so popular during the past few years. It is the same block, but I
added a striped fabric frame with red corner squares around each block and then
added aqua sashing. This created a nine-patch where the blocks come together.
The finished quilt is 68.5 x 83.75 inches -- so it's perfect for a twin bed.
The make-do scrappy
version of Days of '47 was fun to make totally from scraps. I even made use of
leftover backing from different quilts for the borders. I love the geometric
fabrics for the inner borders -- black and cream stripe and a red and cream check.
This quilt measures 63.5 x 63.5 inches.
This is the perfect block to feature a large print in the center square -- or perhaps a fun novelty print for a child's quilt. It lends itself to being very scrappy, or just a little bit scrappy. Either way, I really like the Salt Lake City block.
Have a great day -- and don't worry, be scrappy.
Thursday, August 1, 2013
Variations on a Theme: Bricks and Cobblestones
I've always been amazed at how fabric choices and the use of value can totally change the look of a quilt.
For example, consider these three variations of one of the quilts in my book, Triple-Play Scrap Quilting.
When I first designed and made the quilt, my intent was to create something very simple that could be the first quilt someone makes. Plus I wanted to make it from precuts -- 10-inch layer cake squares, 5-inch charm squares, and a little yardage. The result was this quilt that is totally based on squares and rectangles. The blocks finish 7-1/2 inches in this version.
Have a great day -- and don't worry, be scrappy!
For example, consider these three variations of one of the quilts in my book, Triple-Play Scrap Quilting.
When I first designed and made the quilt, my intent was to create something very simple that could be the first quilt someone makes. Plus I wanted to make it from precuts -- 10-inch layer cake squares, 5-inch charm squares, and a little yardage. The result was this quilt that is totally based on squares and rectangles. The blocks finish 7-1/2 inches in this version.
It is scrappy because every block is different and it uses all 40 fabrics in the fabric line, But it is still coordinated and easy for a beginner to make fabric decisions. They just need to pair two 10-inch squares (plus use some of the light fabric that is also the inner border). Ta-da! That's how "hard" it is to pick the fabrics.
I next made the same quilt from scraps -- yes, no fat quarters were harmed to make this version. The blocks in this version finish 10 inches.
Since each block uses six different fabrics (plus the black and cream four-patch center), it has a completely different look. It's just as easy to sew up, but there are a few more fabric choices. It is scrappy, however, which means the fabric choices aren't going to be complicated. Just a good mix of lights, mediums, and darks.
Most people can look at these first two quilts and it isn't hard to see that they are the same design.
But most are surprised that this version of the quilt using batiks is also the same block pattern. The blocks are also 10 inches, but because the quilt has more blocks it is significantly larger.
This one took some planning because what appears to be the block isn't really the block. While each block only has two batik fabrics plus the cream, there are four blocks with the matching fabrics that come together to form the large batik squares. To keep everything organized I couldn't easily chain piece the blocks and had to do each block in sequence and lay it out on my design floor (no room for a design wall). But I love the result.
If you haven't seen my book, I hope you'll look at it at Martingale's website. Or better yet, encourage your local quilt shop to order a few copies. There are some great resources available for quilt shops -- including some lesson plans (that include the first quilt above) and two traveling trunk shows they can request.
Have a great day -- and don't worry, be scrappy!
Sunday, May 19, 2013
Fun With Kansas Troubles Fabrics
I love all the fabrics designed by Kansas Troubles for Moda. I can mix and match fabrics from various collections and they all work together. I love the warm colors, the interesting light fabrics that work so well for backgrounds, and the gorgeous florals that make great borders and backing.
This is my latest quilt top made from Kansas Troubles fabrics.
I love the "negative space" created by the cream fabric. It will be perfect to show of some great machine quilting.
Have a great day!
This is my latest quilt top made from Kansas Troubles fabrics.
I love the "negative space" created by the cream fabric. It will be perfect to show of some great machine quilting.
Have a great day!
Friday, May 17, 2013
Home Machine Quilting Show -- 2013
Last week was HMQS -- Home Machine Quilting Show. I went to the show on Friday afternoon. (How great is it that I have a full-time job in the quilting industry and had time off to attend the show!)
I spent most of my time looking at the amazing quilts on display. Now that I'm learning to longarm quilt my own quilts, I have an even greater appreciation for the quilting skills that were on display at HMQS.
This was the best of show quilt -- by Marilyn Badger. Amazing!
Jen Alexander, who quilted many of the quilts in my book, also won several awards for her quilts (some made with her mother) and quilting. This quilt was made by many of the people involved in HMQS (including Jen, who quilted it) over the course of 10 years.
Enjoy the rest of the show:
And this one which was one of my favorites. It represents the Young Women values -- Faith, Divine Nature, Individual Worth, Knowledge, Choice and Accountability, Good Works, Integrity, and Virtue.
Wednesday, May 15, 2013
Off to Quilt Market, but first...
,,, a quick blog post.
It was so much fun last week when this box was waiting for me when I got home from work.
And this is what was inside.
My book has been previewed on Amazon for a couple months, but now it is officially available.
But imagine my surprise to see that two "used" copies are available for $140 each.
Do people really fall for this?
Subscribe to:
Posts (Atom)