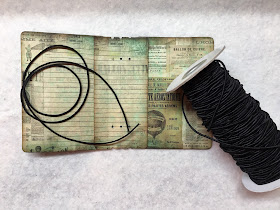
I've had many requests for a tutorial on how to thread the 2mm elastic cording through the spine of the Eileen Hull Passport Die.
So, here's my simple tutorial for threading the elastic cording.
But first, you'll need some 2mm elastic cording. This cording comes in a wide range of colors, but I typically use either black, white, or beige -- depending on the colors in the journal cover.
The spool of 2mm elastic cording has 70 meters/76 yards of cording. That's enough to make more than 100 passport journals using my method of threading the elastic. If you're going to also use the cording for a closure (I'll do a separate tutorial for that), it's enough for about 75 passport journals. That's about 13 cents per journal!
You can easily find the cording on Amazon. Click
HERE.
If you are new to the Eileen Hull Passport Die, you can find it
HERE.
NOTE: As an Amazon Associate, I earn from qualifying purchase.
Tutorial:
To fit the signatures into the journal, your goal is to have inside lengths of elastic cording that will fit the height of the pages. However, I wanted to show the least amount of cording on the outside of the spine -- at just the top and bottom of the spine where it wraps around.
You can see the three lengths of cording giving you the full length of the spine for inserting the signatures. The parts of the cording that stretch across the holes in the spine and are tied together will be covered up after you insert the signatures.
On the outside of the spine, all you see of the cording is where it wraps over the edges.
Step 1:
Cut the 2mm elastic to about 25 inches in length, which is five times the height of the journal. This gives you plenty of elastic to make it easy to tie the ends together when done.
Step 2:
Start with the center top hole. Thread the elastic from inside and leave a 2- to 3-inch tail on the inside.
Step 3:
Wrap the long piece of the cording over the top edge (in the spine's top groove) and back to the inside. Carry it all the way down to the bottom edge. (This will be for the center insert.)
Wrap it around the bottom edge of the spine and thread through the center bottom hole from the outside to the inside.
Step 4:
Carry the cording across the the left bottom hole and thread from the inside to the outside as shown above. Wrap the cording around the bottom of the spine, carry the thread to the top of the spine, around the top, and into the top hole.
NOTE: As you are working, try to keep the elastic cording taught so that there isn't too much slack. This will ensure that your signatures are nice and tight in the journal.
Step 5:
When looking at it from the front of the spine, it will be the top right hole. Thread through the hole from the outside back to the inside of the cover.
Step 6:
Carry the elastic across the top to the top right hole and thread from the inside to the outside of the spine. IMPORTANT: Make sure the cording goes under the previous lengths of cording.
Step 7:
Wrap the elastic around from the outside of the spine to the inside, and then down to the bottom of the spine. Wrap to the front along the bottom right groove in the spine.
Step 8:
Thread the elastic from the outside to the inside through the remaining hole.
Step 9:
At this point, you have the opportunity to tighten up any slack in the cording. When you are happy with how taut the cording is, tie a square knot with the two open ends. I then trim the ends of the cording to about a half inch.
That's it. After doing this a couple times, it becomes second nature to thread the cording.
I hope that having the photos helps as you try out this technique.
Thanks for visiting my blog.
NOTE: As an Amazon Associate, I earn from qualifying purchase.


