Wednesday, June 27, 2012

A Couple Quilts That Didn’t Make the Cut

I made a couple quilt tops that I decided not to include in the book. 

Both were set on point and they were the only two on-point quilts in the book. I knew that if I included them I would need to write involved instructions for on-point settings. But more than that, in each case there was something that I didn’t like about the finished quilt top. Don’t get me wrong – I like the quilts. I just didn’t think they were up to the standard I’d set for other quilts in the book.

Can you see what went wrong in the first quilt in reds, golds and greens? I used the same gold background for the borders and edge setting triangles. But I had bought the fabrics from two different sources because neither online store had as much as I needed. And, wouldn’t you know it, they were obviously different dye lots. It wasn’t so obvious in person – but when photographed, the variation in value shows up. And, unfortunately, it shows the piecing in the triangles (which I wanted to blend together – and it didn’t).
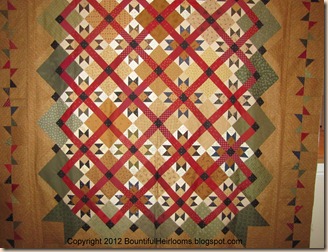
red green quilt with caption

The other quilt uses all Kansas Troubles fabrics. I had a layer cake of 10” squares and extra yardage for background and borders. Unfortunately, I was limited in the fabric combinations I could do for the stars and some didn’t have as much contrast as others. It was a fun quilt, and I’ll probably make another one some day using the same star block design. But it didn’t make the cut for the book. So, in reality, I made 32 quilts for my book – not just 30. 
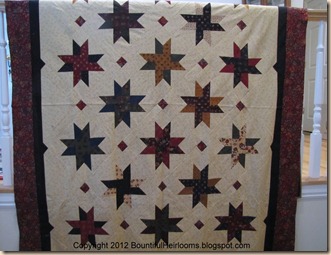
new star quilt with caption

I can’t imagine that I’ll ever do that many quilts in less than a year. Yes, that’s 32 quilt tops. And 30 finished and bound quilts. Oh how I wish I could share them with you. I think I need to create a countdown timeline for my blog with the countdown until the book is released. But that will probably make the time go slower with the constant reminder.

Monday, June 25, 2012

Back to Blogging

I officially sent off my book manuscript to the publisher about 10 days ago! Yippee! My last quilt (of 30!) is being quilted. All of the quilts will be sent off the week of July 9th. Then the technical and copy editing by Martingale editors begins. The schedule has page proofs for review in November, and book ready to ship the beginning of June 2013. So, it will be nearly a year before it’s available for purchase. But at least we’re making progress.
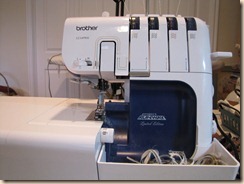
I was able to do some non-quilt sewing over the weekend. I splurged on a serger a few months ago and other than thread it and briefly try it out, I wouldn’t let myself do any sewing/serging. I bought the Brother 5234 Project Runway serger (which was on sale back in early April). It’s not a high-end serger – but so far  I’ve been really happy with it. I couldn’t justify buying something too fancy for my first one.
IMG_1943
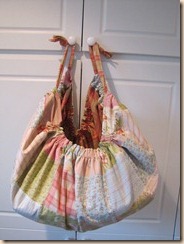
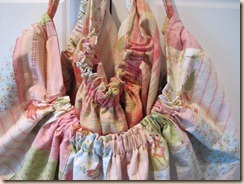
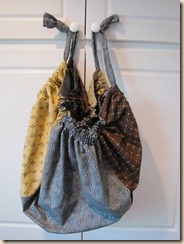
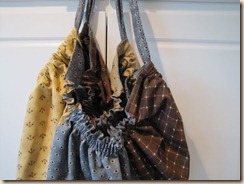
My first projects were two large “fat quarter” bags which are great for toting quilts around. Each bag can hold 3 small quilts or 2 medium/large quilts.
IMG_1935
IMG_1941
Rather than use fat quarters for the first bag, I dug through my stash and found this great fabric that looks like the outside fabric was pieced. It was pieced, just not by me. It came off the bolt with the squares actually sewn together (it’s not your typical cheater cloth). I don’t remember what I had in mind  for the fabric but I had enough of it plus a matching plaid lining fabric to make the bag.
I did use fat quarters for the other version of this bag. I had  left over fat quarters from a fat quarter pack that I’d used to make a wedding quilt for my nephew and his wife. I  also had enough of a coordinating fabric to use for the lining and the ties. Ta da! Another bag but with a completely different look.
IMG_1939
IMG_1938
I have a third bag nearly done – except for the handles/ties. For that one I used a couple Kathy Schmitz fabric panels that I  impulsively bought several years ago. I knew I’d never use them in a quilt, so now they are a bag. I made that bag bigger than the pattern so that I wouldn’t have to cut away any of the panel. The bags are fun to sew up and they each take only about 2 hours.
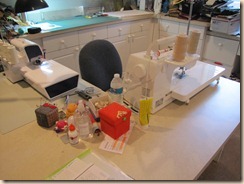
I’m slowly getting my sewing room back into some semblance of order. I like how I’ve been able to situate my new serger to the left (in the photo) of my sewing machine. But it’s actually to my right when sewing. And I can push the serger to the back of the counter when I need more space by the sewing machine. Very handy.
IMG_1945
I’ve missed blogging, but especially missed spending time reading other blogs. You’ll be hearing from me a lot more than you have in the past many months.
 

LinkWithin

Related Posts with Thumbnails